

Simplified yet powerful Sprite Animation and Manipulation
Spryt Animator Pro allows you to breathe new life into single-frame sprites and add some extra appeal to multi-frame animations through simple image manipulation. In addition, Spryt Animator Pro provides a quick and easy way to manipulate image properties via script. It can even completely replace Mecanim to remove the need for multiple Animators and Animations cluttering up your project.
Also available; Spryt Lite

If all you want is an easy to use, lightweight replacement for Mecanim, check out Spryt Lite. It’s your One-Script Solution to replacing Mecanim, and features some handy Animation helper methods to boot!
Features:
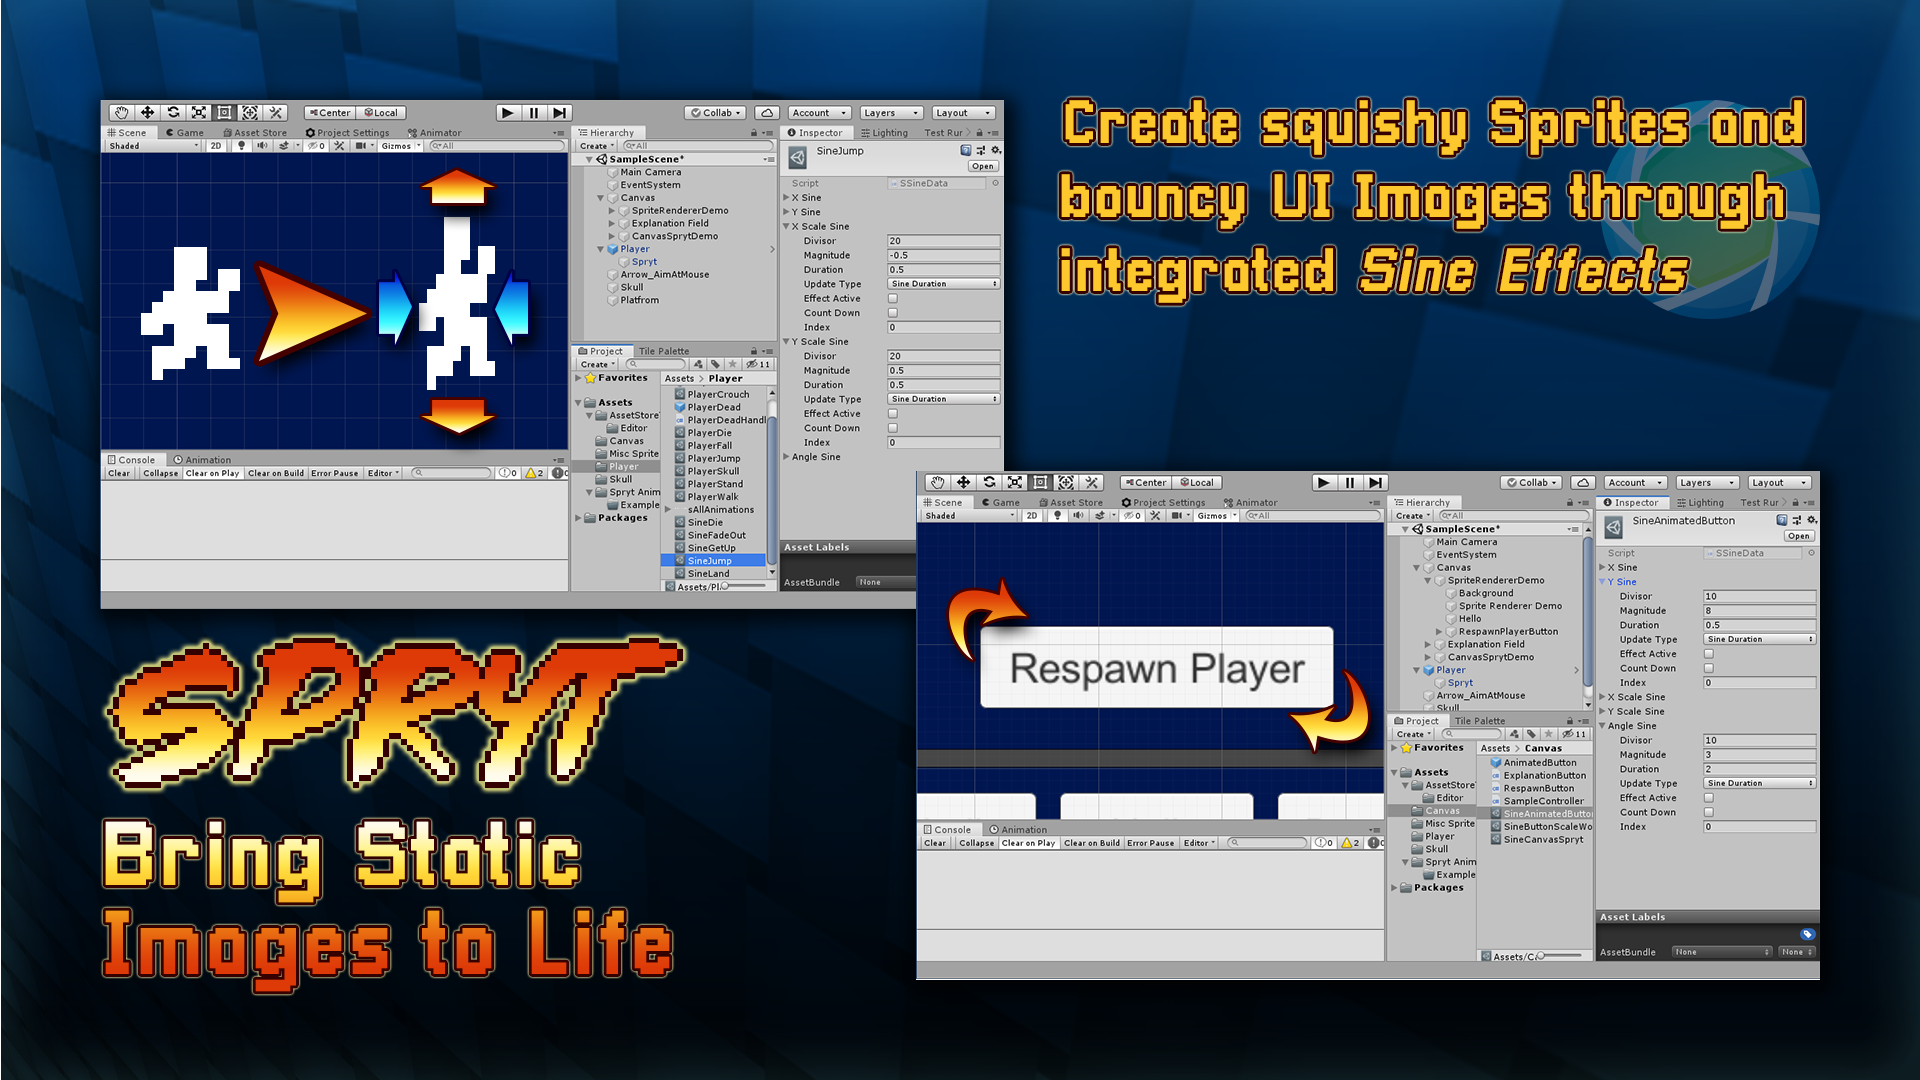
Bring Static Images to Life: Create squishy Sprites and bouncy UI Images through integrated Sine Effects.
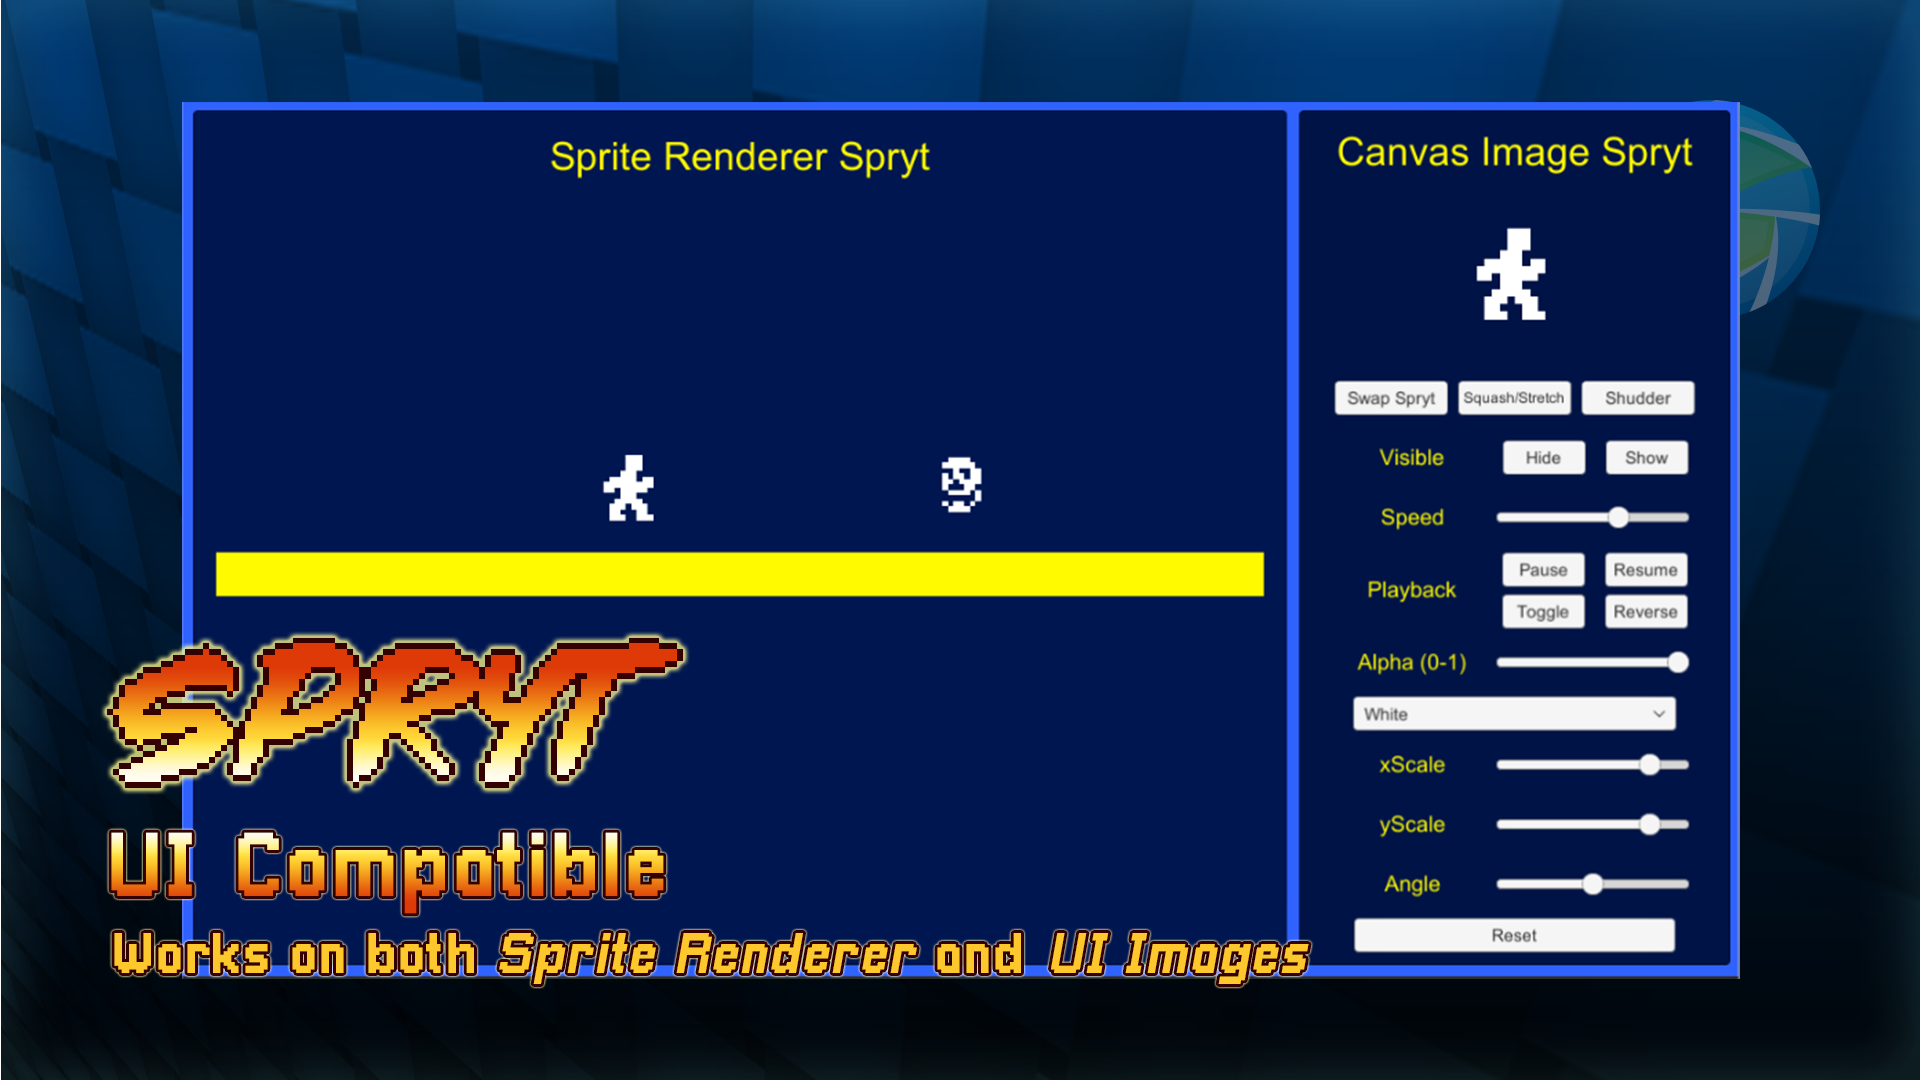
UI Compatible: Works on both Sprite Renderer and UI Images.
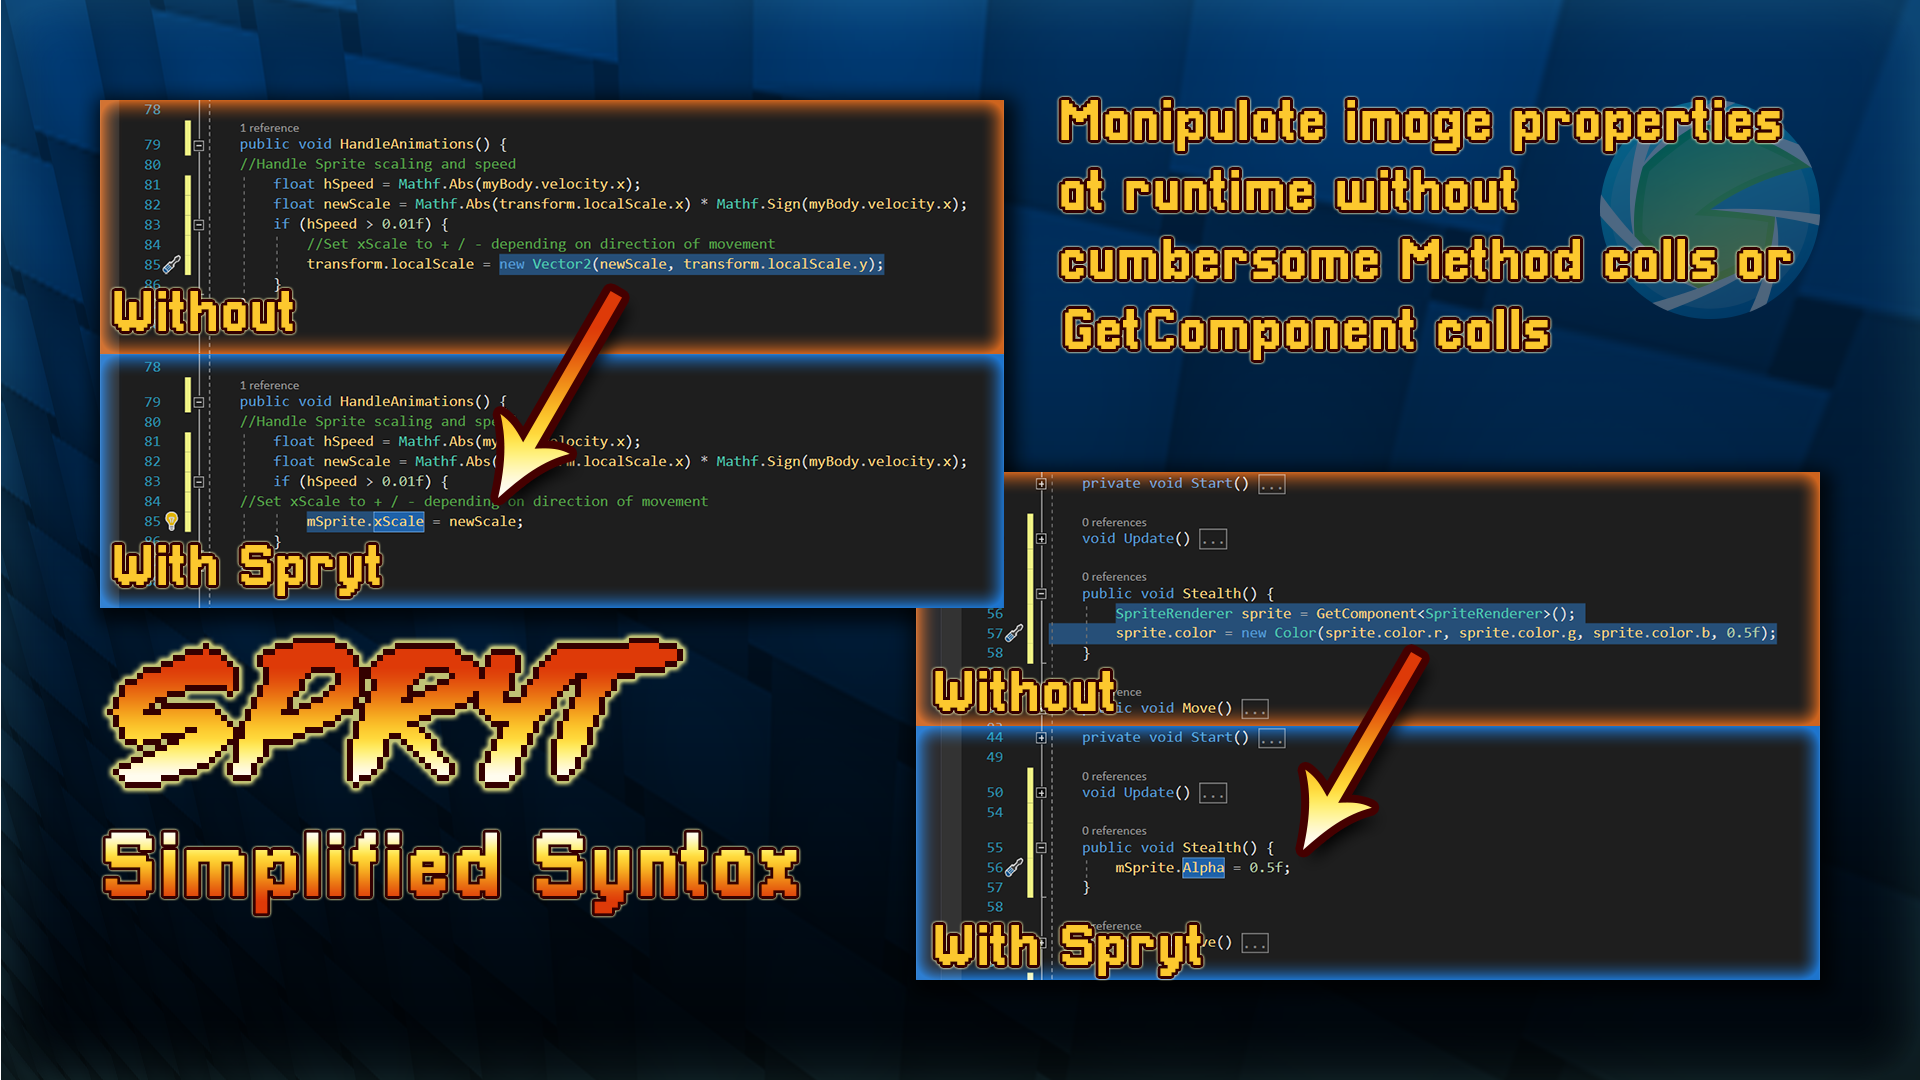
Simplified Syntax: Manipulate image properties at runtime without cumbersome Method calls or GetComponent calls (sprite.Alpha = 0.9f;)
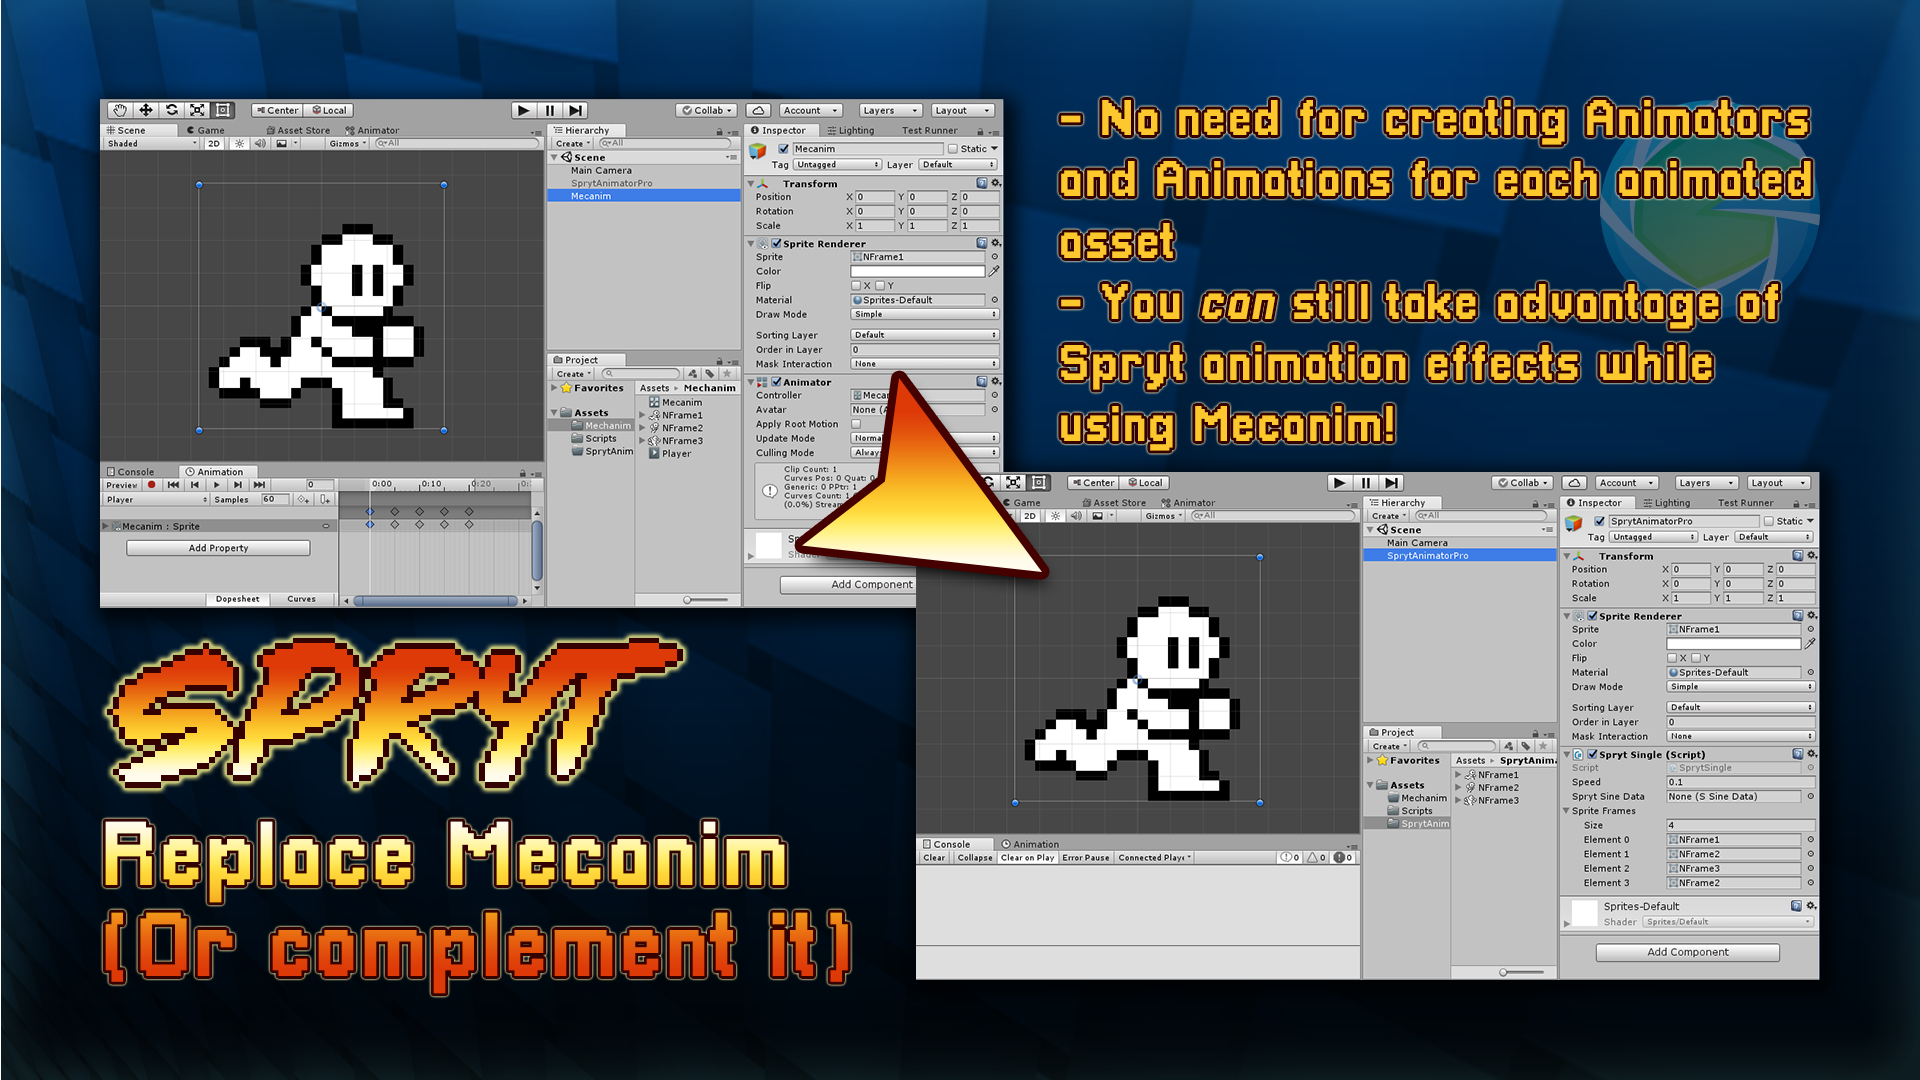
Replace or Complement Mecanim: No need for creating Animators and Animations for each animated asset, though you can still take advantage of Spryt animation effects while using Mecanim
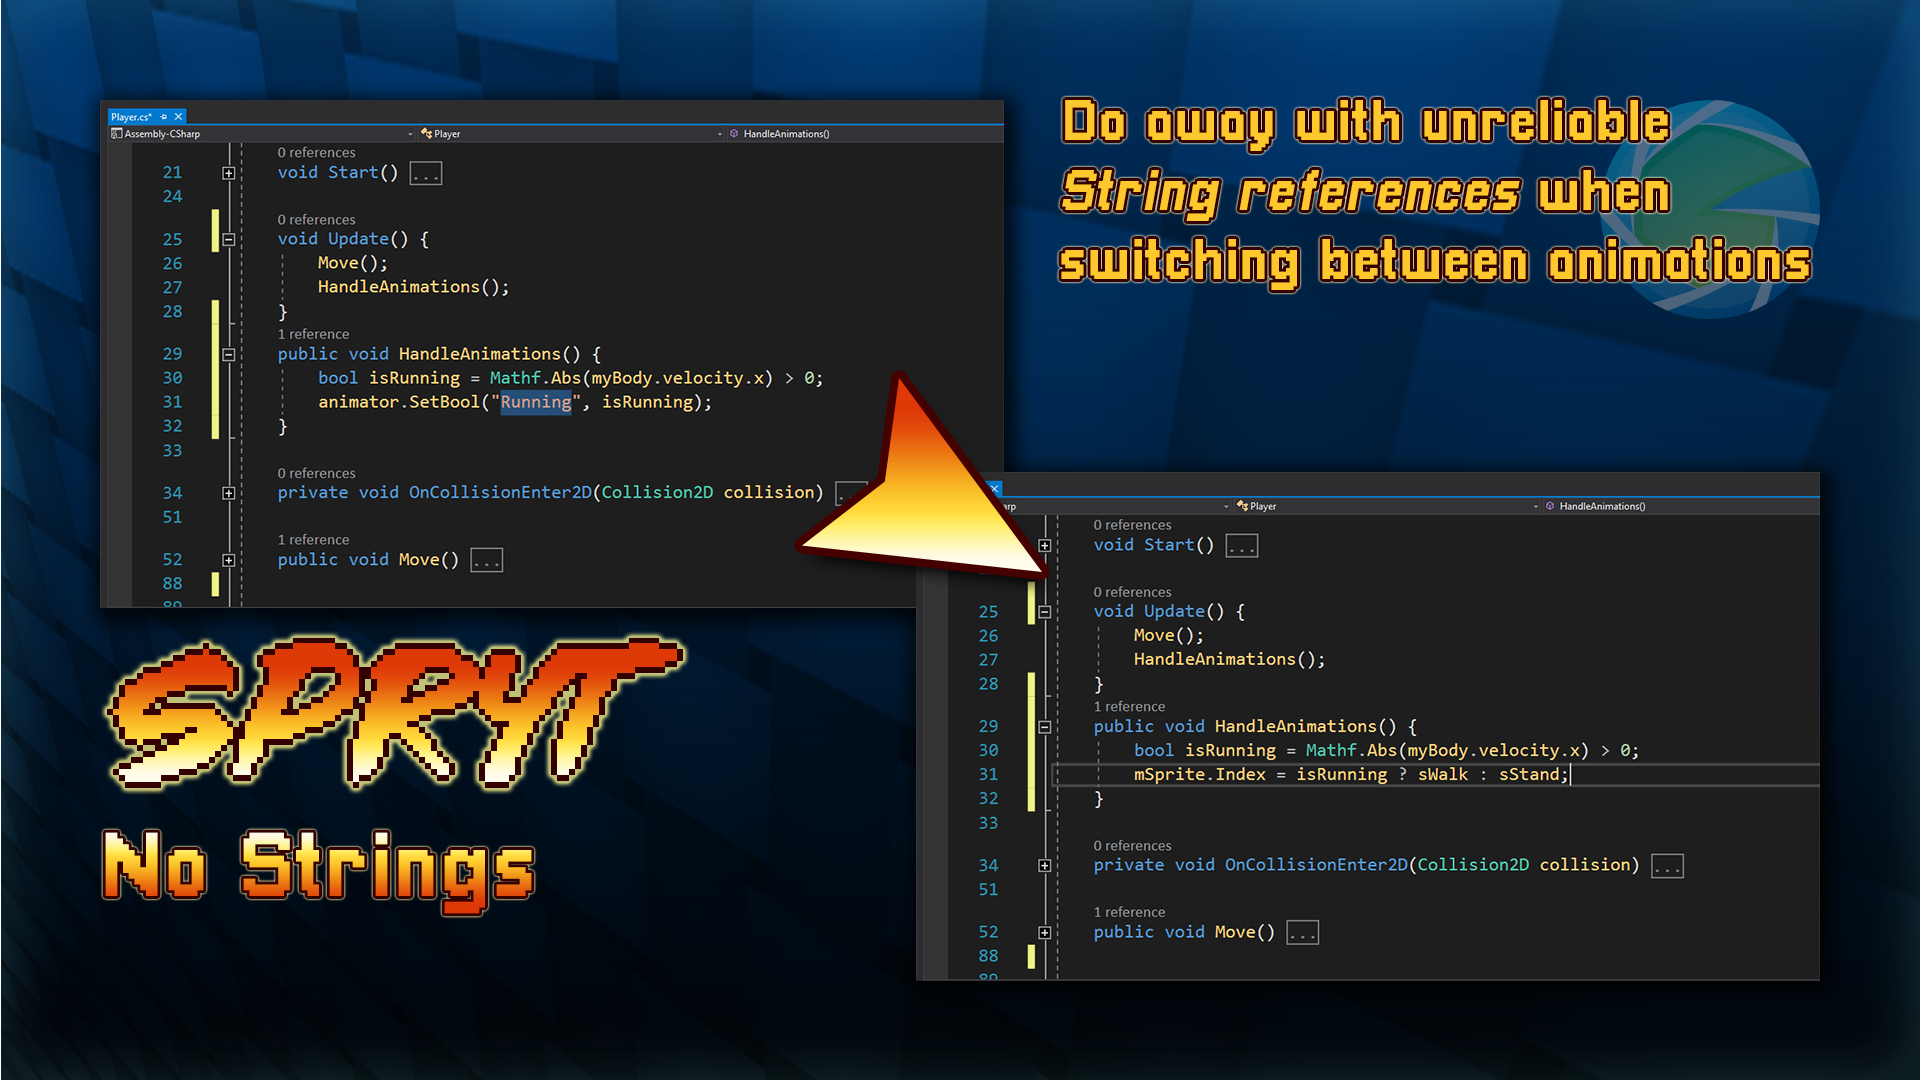
No Strings: Do away with unreliable String references when switching between animations
Control Playback: Play, Pause, Reverse, PlayOneShot animation Methods
Animation End Event: Trigger methods using the Animation End Event
Sine Effects: Includes “Sine” utility class for use beyond Sprite manipulation
Fully Documented: Scripts include “summary” tags for Intellisense in Visual Studio
PDF Documentation
The complete documentation for both the paid Spryt Animator Pro and the free Spryt Lite available here:
FAQs (Frequently Asked Questions)
I’m getting Compile Errors after importing the asset into my project
.NET Compatibility: To ensure compatibility with Spryt Animator Pro scripts, you will need to use a newer standard of .NET in Unity. It is recommended to do this before Importing the Package to avoid any Compile errors, but it can be done after importing the package. The way this is done varies based on which Version of Unity you are using:
For Unity 2017x: “Edit > Project Settings > Player > Other Settings > Configuration > Scripting Runtime Version” should be set to “Experimental (.NET 4.6 Equivalent)”. Making the change will require a restart of Unity.
Unity 2018 onwards: “Edit > Project Settings > Player > Other Settings > Configuration > Api Compatibility Level” should be set to “.NET 4.x”
The Example Scene doesn’t import properly
Due to an issue exporting Asset Packages from Unity Version 2019.2.1f1, the Example Scene can only be properly viewed in this version of Unity or later. The Scripts that form the core of Spryt Animator Pro will function as far back as Unity Version2017.1.5f1
My Sprites are tiny!
In the Sprite Import Settings, change the “Pixels Per Unit” to a number smaller than “100” (the exact size will depend on your artwork).
My Sprites are blurry!
In the Sprite Import Settings, change the “Filter Mode” to “Point (no filter)”
You may also need to change “Compression” to “None”
How do I use Spryt Animator with Unity’s Mecanim?
Simply assign SprytSingle to a GameObject and leave its “Sprite Frames” List empty, this will allow you to use Sine Effects and most other Properties of the Spryt Animator system, but you will not have control over playback or any of the Animation methods (since Mecanim is now in charge of this).
How do I use Spryt Animator Pro on a UI Image?
Spryt Animator Pro works identically on UI Images as it does with regular Sprite Renderer images. Simply attach either SprytSingle or MultiSpryt to the GameObject.
As an added bonus, if Spryt Animator Pro detects that it is being used in a Canvas, you can use the “rect” property for easy access to the RectTransform Component of the image.
What’s the best way to make a Sprite-Sheet for use in Unity?
This ultimately depends on what you’re using it for. Here are some quick rules-of-thumb. Note that following these steps will make it easy to import / use sprites, but it will not be very efficient (your Sprites will end up with lots of blank space).
Maximize Dimensions: It is best for each image in a sheet to occupy the maximal dimensions required by the animation.
Even if one frame could be smaller than the others, pad it with transparent pixels so that they all match width / height.
For example, if one frame is 12x16 while another is 16x16, add 4 pixels to the width of the first frame.
Anchor Positions: If the sprite-sheet is of a character action, the character should maintain its position relative to other frames.
If a character is taking a step forward as part of a sword swing, you will likely want to use the foot that doesn’t move, acting as a sort of “anchor” between frames.
Buffer your Tile-sheets: If you’re working with tile-sheets (for use in creating a tiled background / foreground) buffer your tile-sheets. To understand why you should do this, you can read this documentation (yes, it’s for an old version of GameMaker, but it totally applies!)
Support
Unable to find the help you need in the FAQ above? Please use the button below to submit a request for support. Please note that any questions which are answered in the documentation or FAQ above may be ignored or be treated with lower priority.